3.Control
3.1 Control Linear Motor through xArm Studio
3.1.1 Set up Linear Motor
Enter Settings-Tools-Linear Motor
- Turn on "Is Linear Motor installed"
- Click "Initialize" button.
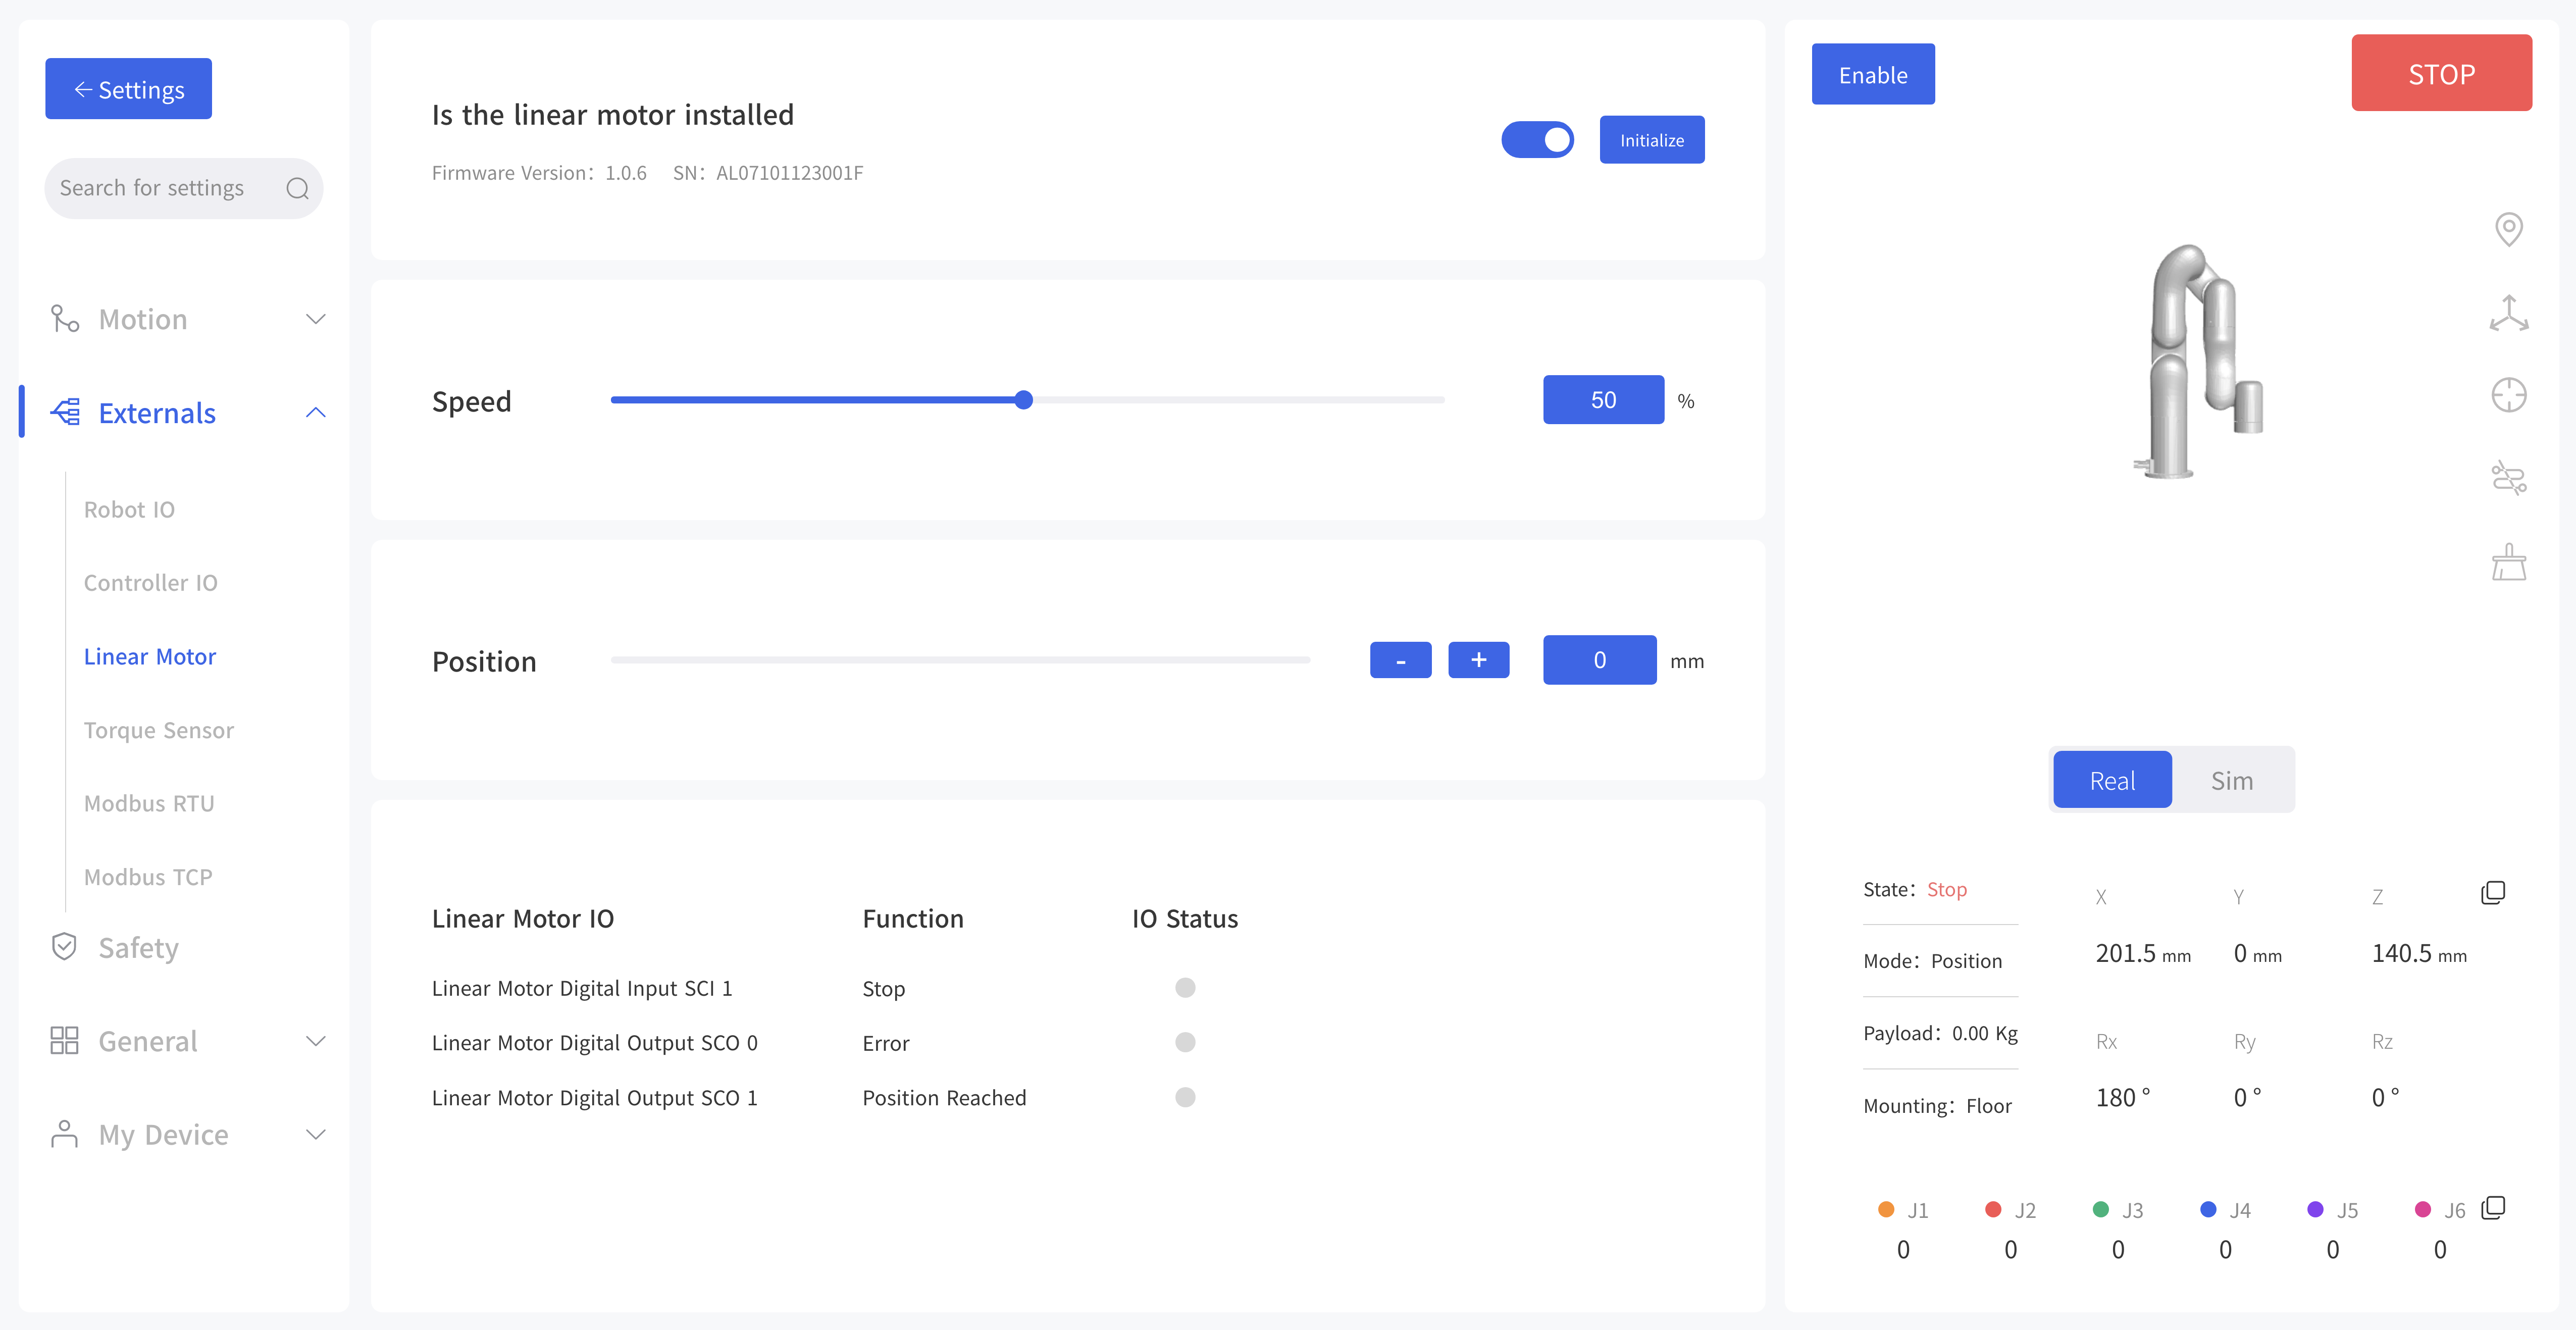
Is Linear Motor installed button should be turn on.
Click Initialize button to enable the Linear Motor and return to zero position. After the initialization is completed, the Linear Motor will be ready to move.
3.1.2.Control Linear Motor
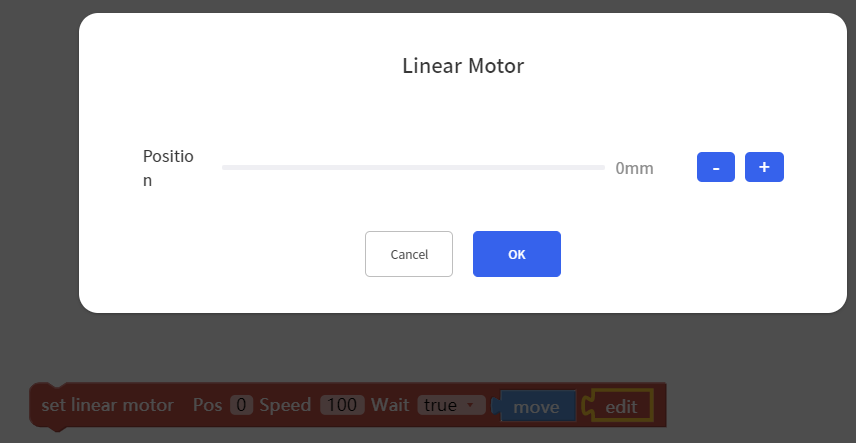
- In Linear Motor interface, the speed and position of the Linear Motor can be adjusted through the progress bar, +/- keys, and input box.
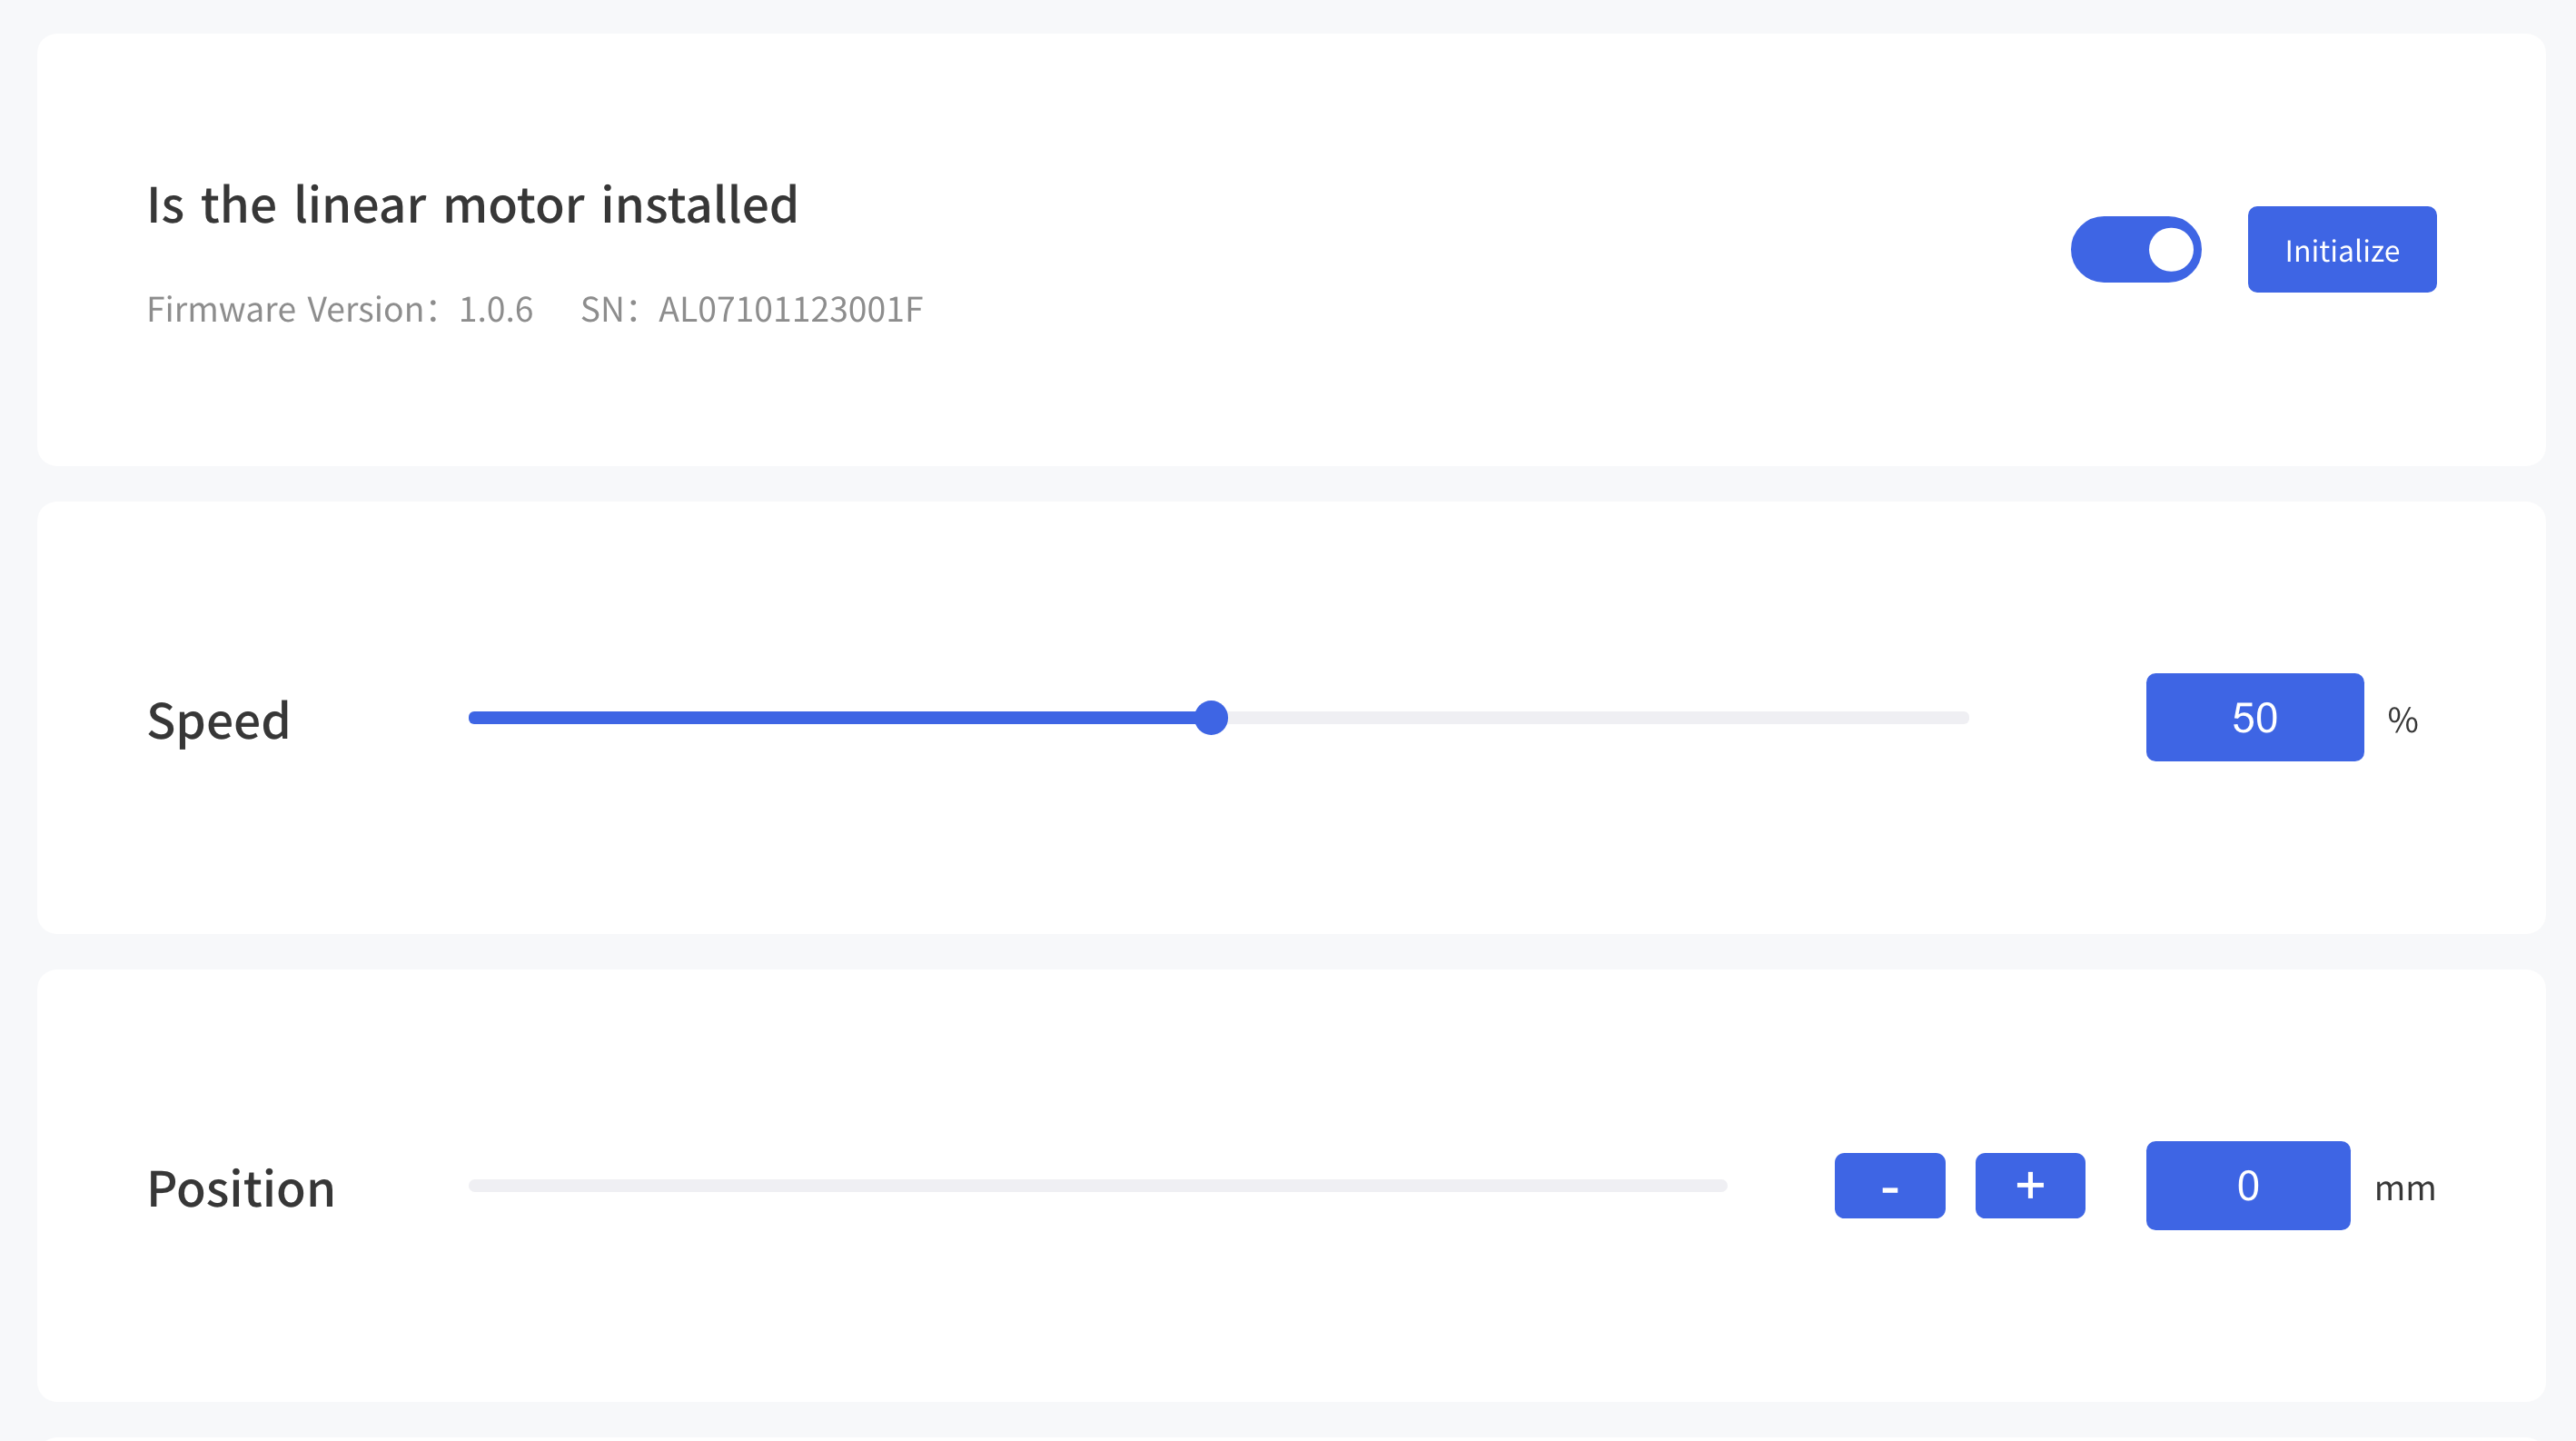
- You can check the IO status of the corresponding function by observing the IO
- Control the Linear Motor through Blockly
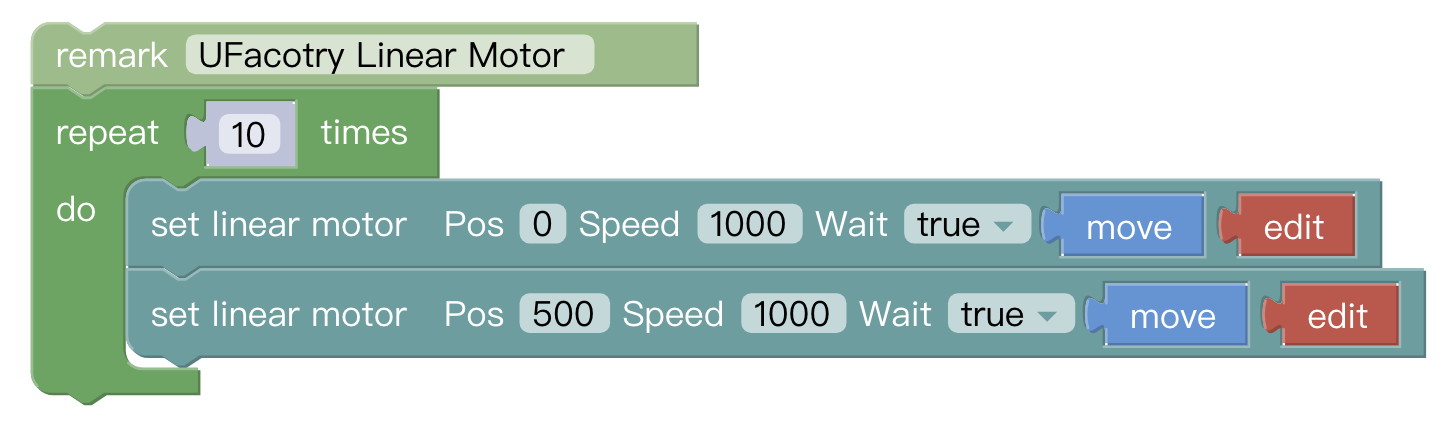
The role of this program: execute this program to control the Linear Motor to reciprocate 10 times at the highest speed(1000mm/s) from the zero position to the farthest position.
Note:
(1)Before moving the linear motor for the first time after power on, it is a must to go back to zero position and do initialization first.
(2) Click 'Edit' button, can quickly modify the position of Linear Motor.
3.2 Control Linear Motor through Python-SDK
For details on controlling Linear Motor with python-SDK, please refer to the link below:
3.3 Indicator
Linear Motor has two indicators, which are at the end plate of Linear Motor.
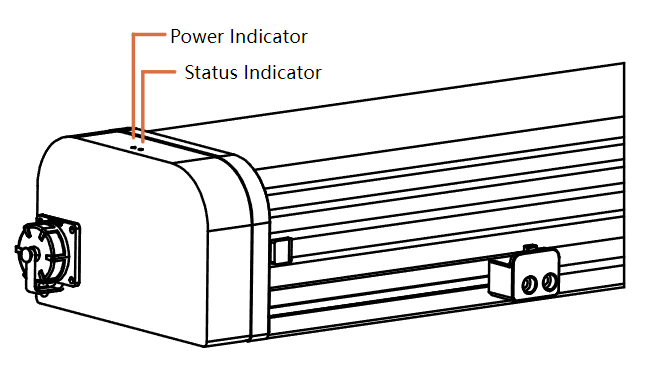
1-Power indicator: it will show red light when power on.
2-Status indicator: a steady green light indicates normal status; a flashing green light indicates there is an error.
3.4 IO Control
Linear Motor has three IOs, one Input and two Outputs.
SCI1: Emergency stop of Linear Motor, low level effective.
SCO0: Output high level, indicating there is an error of Linear Motor.
SCO1: Output high level, indicating the position has been reached.